Beginner’s Guide to WordPress 404 Error Pages

[ad_1]
The content you post on your website — whether part of a page or post — is usually permanent. However, if an issue arises (either technical or otherwise), an item of content may not display. Instead, it triggers a 404 error, which isn’t good news for your website or its users.
In a nutshell, a 404 error signifies that a web page is not found. However, unlike other errors, they’re usually displayed on dedicated pages. With a customized and optimized 404 error page, you can get visitors back on the right track.
What is a 404 Error?

As we discussed, a 404 error is a response code indicating that although a user was able to connect to a website’s server, the page can’t be found. This occurs for a number of reasons, such as:
- A page or post has been moved or deleted.
- The server is having trouble loading the page.
- The URL that leads to the page is incorrect.
- The post or page never existed in the first place.
Naturally, a 404 error can significantly reduce your website’s traffic. As such, it’s crucial that you find and fix these errors on your website fast. First, however, let’s look at what 404 error pages are used for.
An Introduction to 404 Error Pages
A 404 error page alerts visitors to a missing page or incorrect URL. Many websites use the default page provided by their theme, but 404 error pages can also be customized to improve User Experience (UX).
Most commonly, an error page will note the issue and provide alternative options for the user to choose from: for example, a Return to the Home Page link, related content, or a Search box.
A good 404 error page should contain a few essential elements. These include a link or navigation menu, an on-brand apology or explanation, and a Search box.
For example, Cloud Sigma opted for a quirky explanation and an easy-to-find Back to Homepage button. This helps to lessen the frustration while also enabling the user to return to the main site with minimal interruption:

Repair Pal presents another good example of a well-implemented 404 error page. They opted to stick with their default theme — keeping the navigation menu intact — while also providing users with a way to interact immediately with the page.
For example, visitors can choose to Get an Estimate or Troubleshoot Your Car:
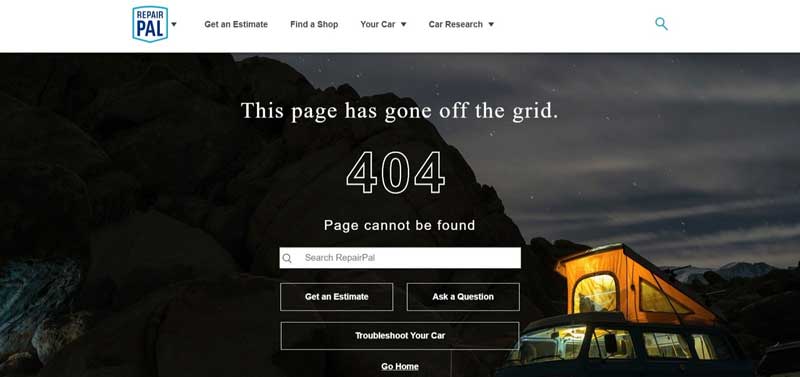
As you can see, creating a functional page is a useful way of mitigating the effects of a 404 error. It can also ensure that your website has an air of professionalism, despite an error being present.
Get Content Delivered Straight to Your Inbox
Subscribe to our blog and receive great content just like this delivered straight to your inbox.
How to Find and Fix 404 Errors on Your WordPress Website
While 404 errors are bound to happen on occasion, frequent occurrences can mean more serious problems are present. For example, there could be issues with your website’s server or with incorrectly set permalinks.
Fortunately, it’s possible to find these errors within WordPress. What’s more, once the issues are resolved, you can apply what you’ve learned to avoid the problem occurring in the future.
How to Create a 404 Errors Report in GA4
Google Analytics is great for rooting out 404 errors. Within the dashboard, go to Explore and choose Blank:

Name your report “404 Report” and click on the + sign next to Dimensions:
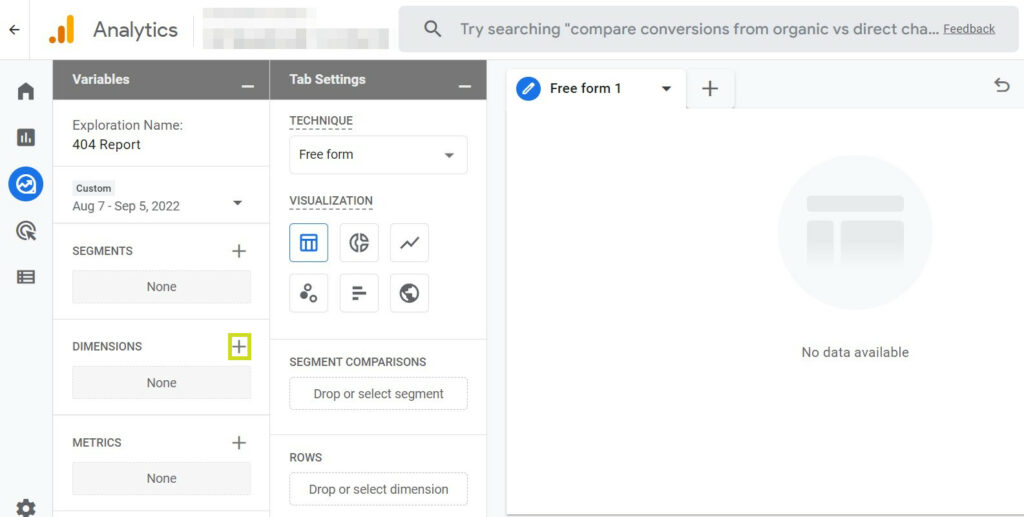
Select Page title and Page path + query string from the available dimensions and click on Import. Next, click on the + sign next to Metrics to find and import Sessions:

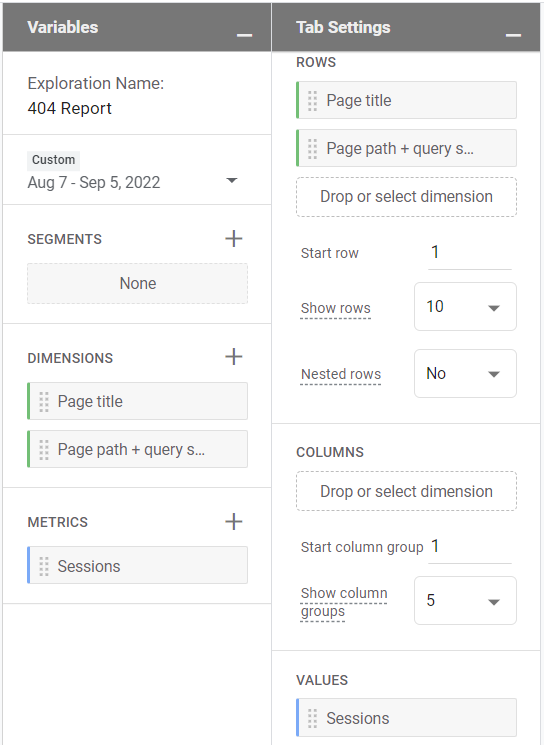
You’ll now need to drag your Dimensions under Rows and Metrics under Values:
Next, drag Page title under Filter. Then, choose contains from the dropdown menu and type “Page not found” into the Enter expression box:
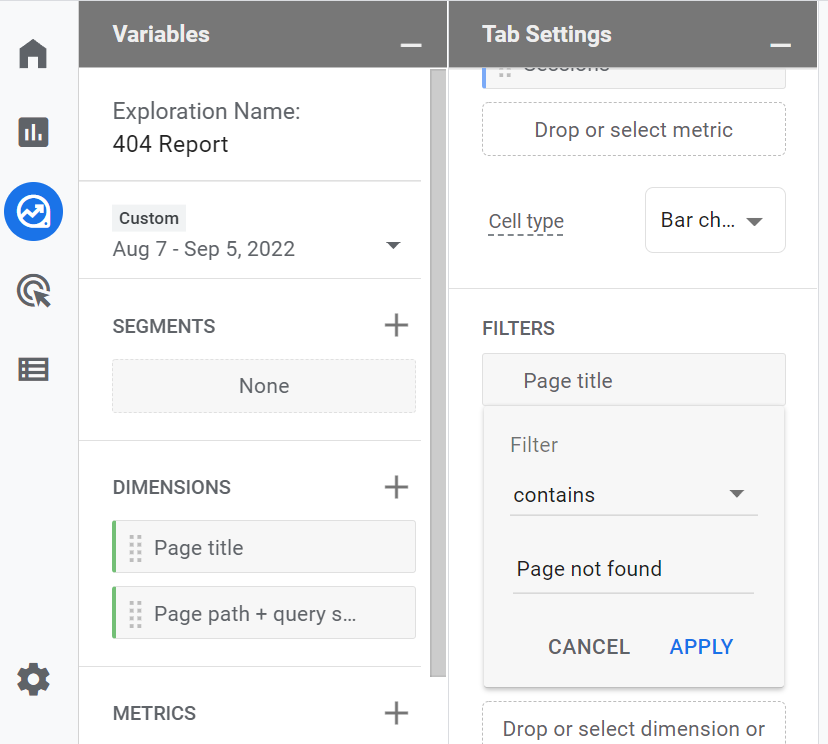
Hit Apply, and you’ll see a report of all the 404 errors on your website. Regardless of whether there’s a wider problem on your site, WordPress makes this easy to fix.
How to Deal With 404 Errors On Your Website
Even if you do your best to avoid them, 404 errors are bound to happen from time to time. However, there are ways to minimize their disruption. Let’s take a look at two now.
1. Create a Dedicated 404 Error Page
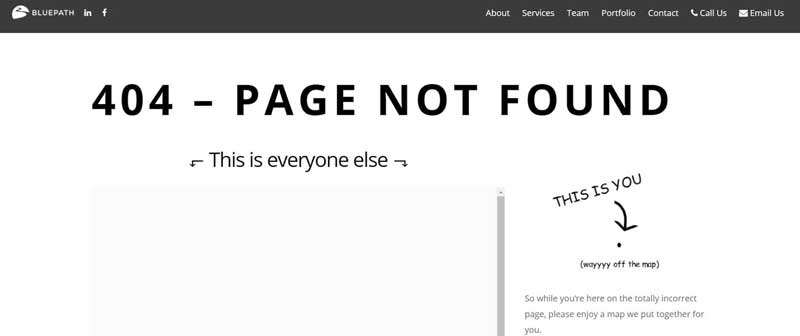
WordPress is flexible enough to let you edit practically all of your 404 error page’s elements. To create a custom 404 error page for your site, you have two options — manually or using plugins.
Many themes include a 404.php template file by default. If this is the case for your theme, you can locate the file yourself and edit the message that’s currently in place.
Before you do that, however, it’s a good idea to create a child theme to work with. That way, you won’t be making permanent changes to the parent theme.
After creating a child theme, go to Appearance > Editor within WordPress and open 404.php in the file list to the right of the editor:
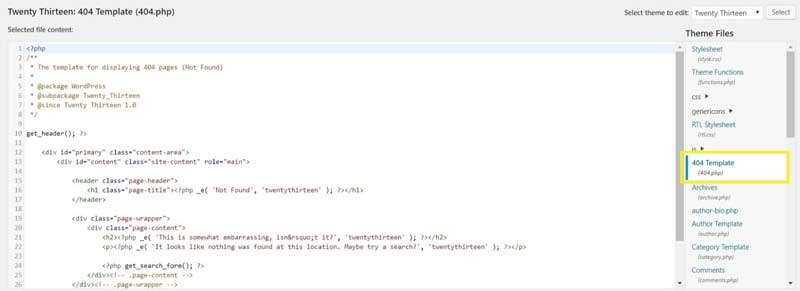
From here, look for the <div class=”page content”> line, and simply edit the message to your own requirements (saving your changes once you’re done).
Note that if you’re using a WordPress block theme, you can edit its 404 page by navigating to Appearance > Editor > Templates:
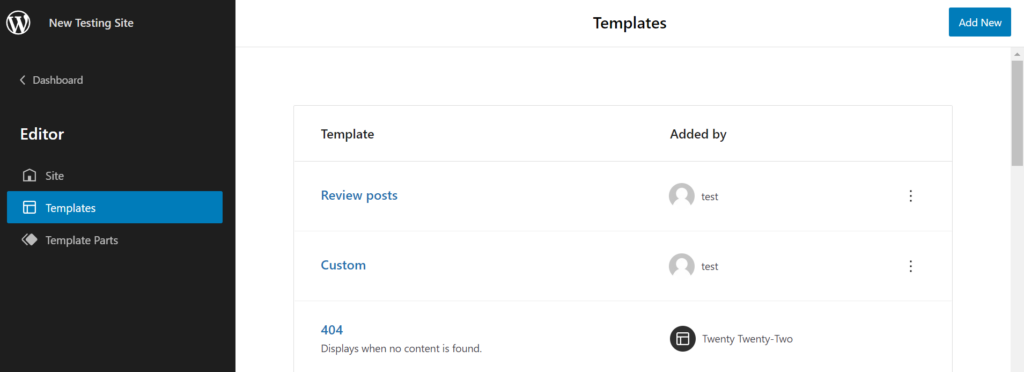
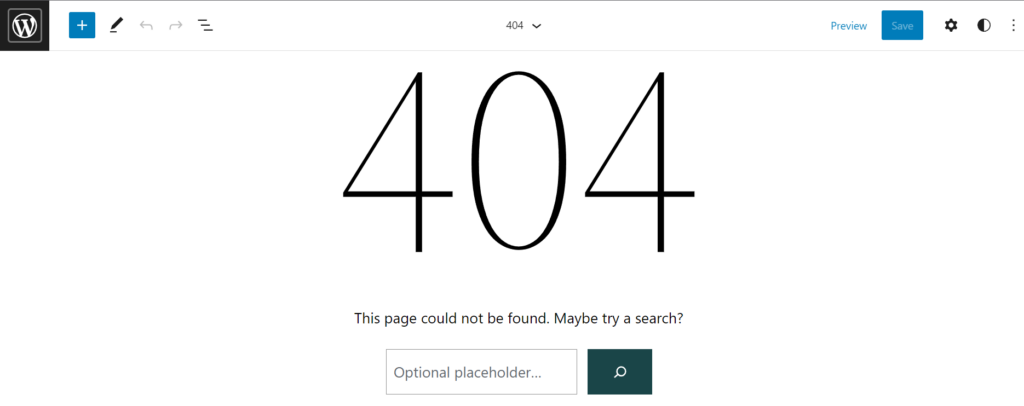
Simply click on 404, and you’ll be taken to an editing screen where you can build a custom 404 page using WordPress blocks and template parts:
If you don’t have a 404.php file in your current theme, you can create your own using the guidelines found in the WordPress Codex. However, you’ll need access to an FTP client such as FileZilla.
Open FileZilla, and enter your website credentials to gain access to your file directory. Double-click your website’s root folder (sometimes called public_html), and navigate to wp-content > themes > [themename] > 404.php. We’re using Twenty Thirteen’s 404 template, but you’re welcome to browse to another theme with a similar template.
Next, right-click the 404.php file and select View/Edit:
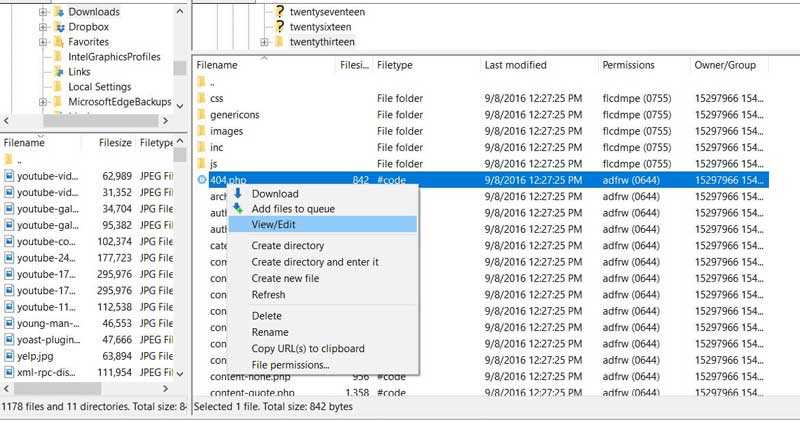
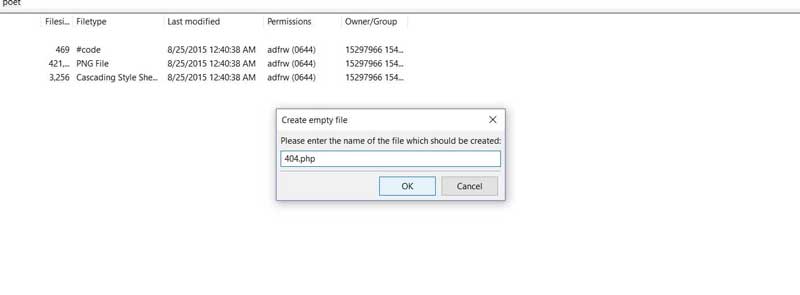
The file will open in your text editor. Highlight the entire code within, and copy it. Now return to FileZilla and navigate back to the themes directory. Select your current website theme and right-click. Select Create new file from the drop-down, and name it “404.php”.
Click OK, then right-click the new 404.php file. Select View/Edit from the drop-down and paste the code that you previously copied. Of course, you can edit the content to your own requirements. Once you save the file, you’re all set!
Alternatively, you can use WordPress plugins such as 404page and Custom 404 Pro to achieve the same goal. Once installed, they enable you to replace your theme’s default 404 page or create one if your theme doesn’t have one included. These plugins will be ideal if you’re wary about tinkering with your WordPress core file structure.
2. Set Up an Automatic Redirect to a More Useful Page

An alternative to a 404 error page is to just redirect the visitor. Simply put, a page redirect is a way to send traffic from one web page (such as a 404 error page) to another. This is a good choice for a number of reasons.
For example, if you’ve changed the URL of an old page or post or deleted any old content, you can redirect visitors to the new page. The good news is that there are a plethora of redirect plugins available, including Redirection and Safe Redirect Manager.
Set Up a 404 Error Page on Your WordPress Site Today
404 errors require a quick and professional response in order to prevent your website’s traffic from being negatively affected. Fortunately, WordPress makes it easy to manage 404 errors and redirect visitors.
Do More with DreamPress
DreamPress Plus and Pro users get access to Jetpack Professional (and 200+ premium themes) at no added cost!

[ad_2]
Source link
